
This page contains basic instructions for editing your site, including:
- Logging into Your Dashboard
- Editing Pages and Adding Text
- Creating New Pages
- Managing Your Pages
- Adding Photos
- Glossary of Terms
Be not afraid!
Yes, there is a little bit to learn, but with a little bit of reading here you’ll soon be a pro. And best of all, you’ll find it fun!
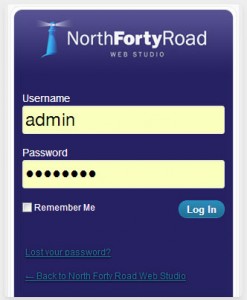
Logging in to your Dashboard
The Dashboard is the administrative area for your website. To get there you must log into your website using the WordPress Login Page. To find the login page simply add /wp-admin to the end of your website address. For instance: www.yoursite.com/wp-admin
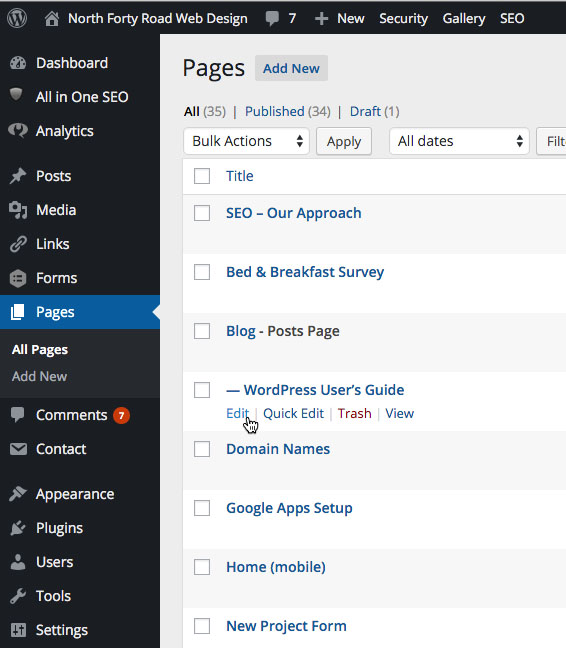
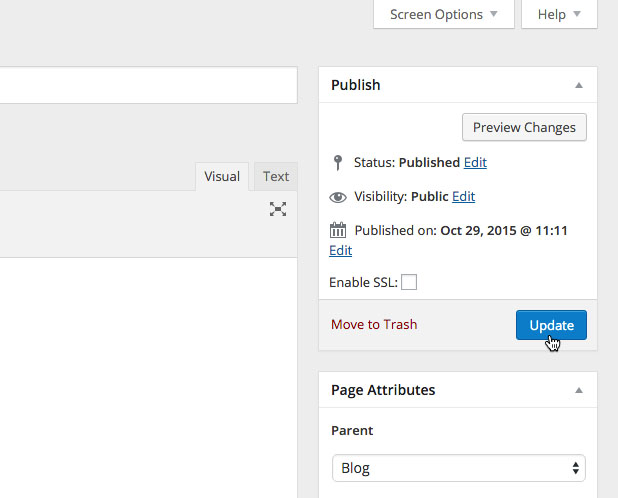
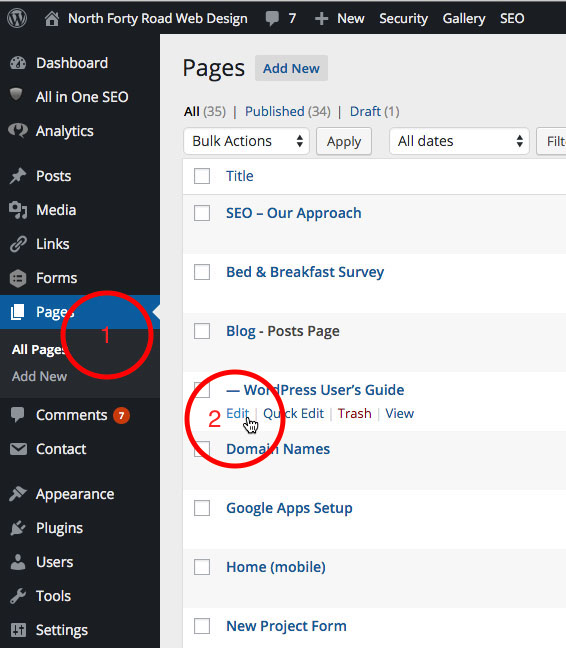
Editing Pages and Adding Text
- Click on “Pages” in the left main menu.
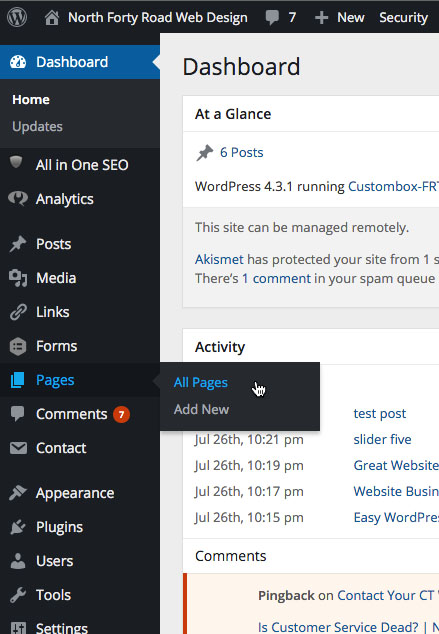
- Click the page you would like to edit.
- Make the changes you need in the editor.
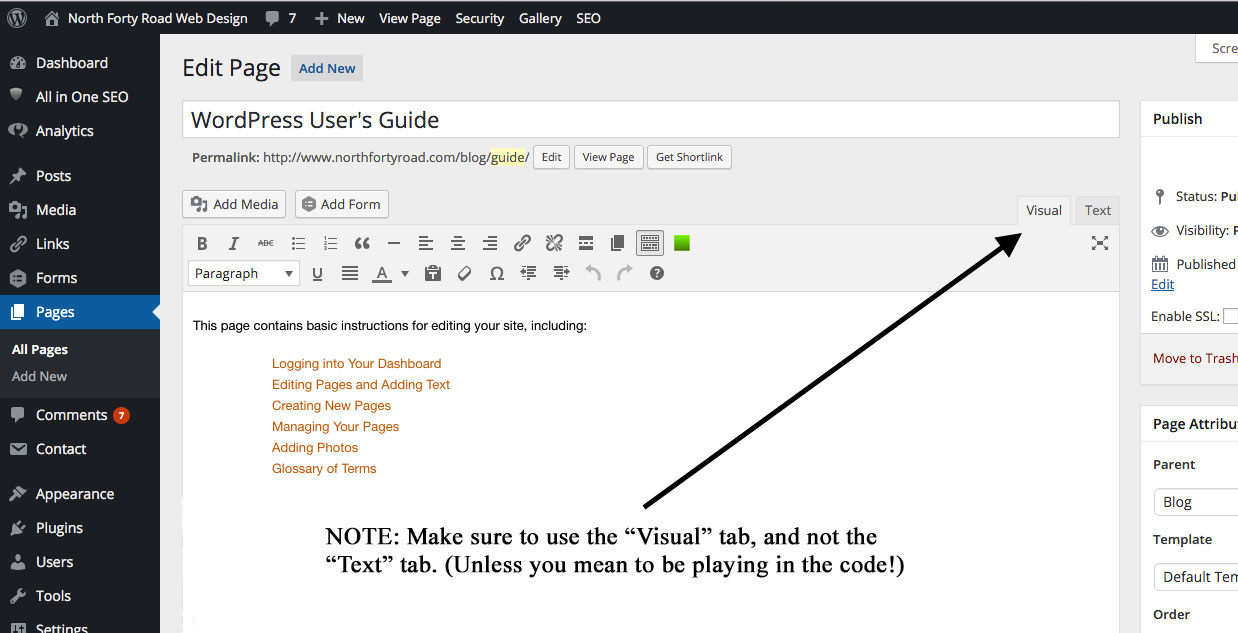
- Cick “Update” on the top right of the page when you are finished.
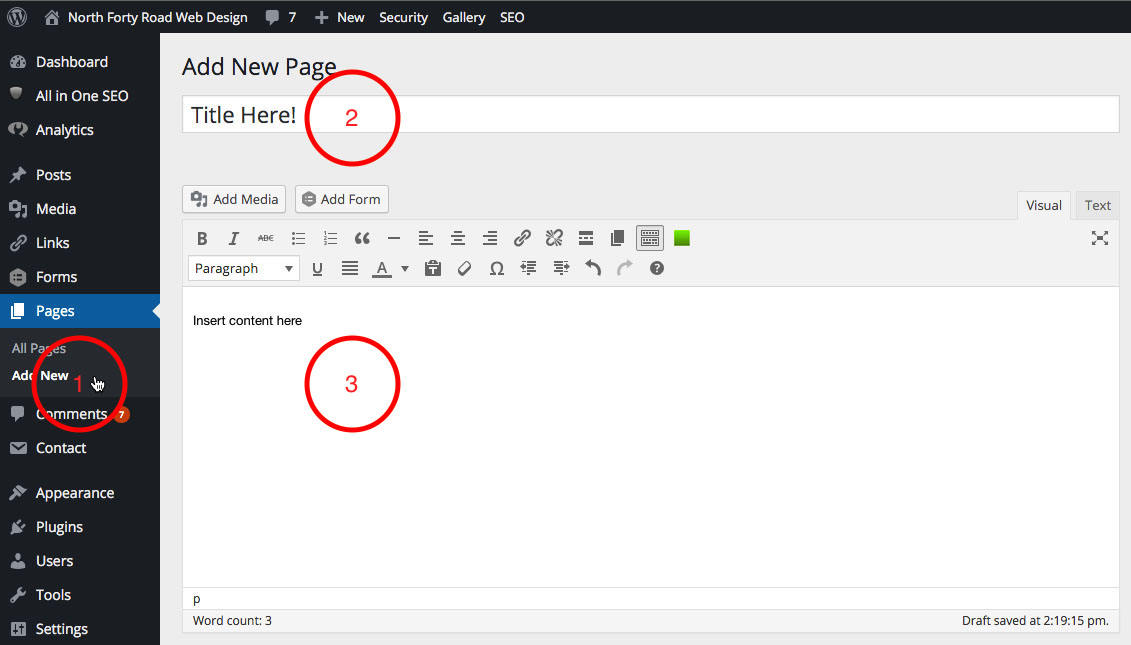
Creating New Pages
- Click “Add New” under the “Pages” heading in the left main menu.
- Add a title for the page in the top most field.
- Create the content in the editor.
- On the right column, under “Parent” select the parent page you’d like this page to appear under. If you’d like to create a new top level page, simply leave this at “Main Page (no parent)”.
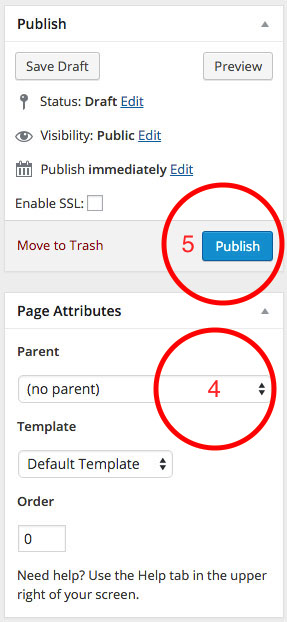
- When the page is complete, click on “Publish”. If you need more time to work on the page before making it go live, simply click on “Save Draft”. You will be able to come back to finish the page later, and then “Publish”.
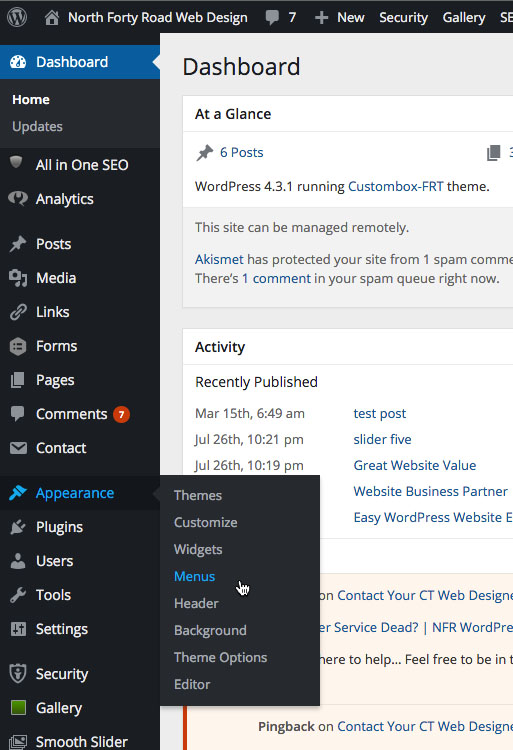
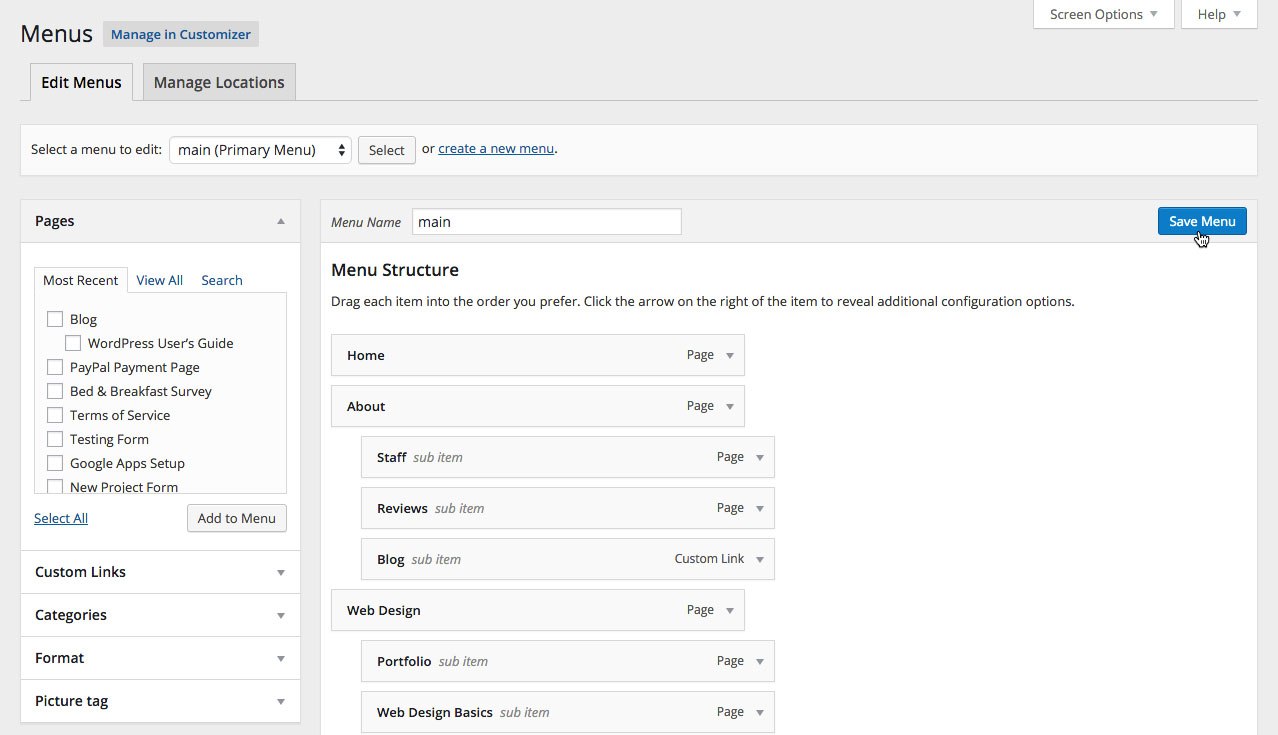
Managing Your Pages
Menus allow you to easily organize the pages on the site into parent and children, or sub pages. The pages that you change here also automatically change in the menu. To use this, simply drag the pages up or down to change the page order and left or right to change the page`s parent, then hit “update”.
- Click the “Menus” heading in the left main menu, a submenu of “Appearance”
- Rearrange any of the pages as described above.
- Click “Save” in the upper right corner.
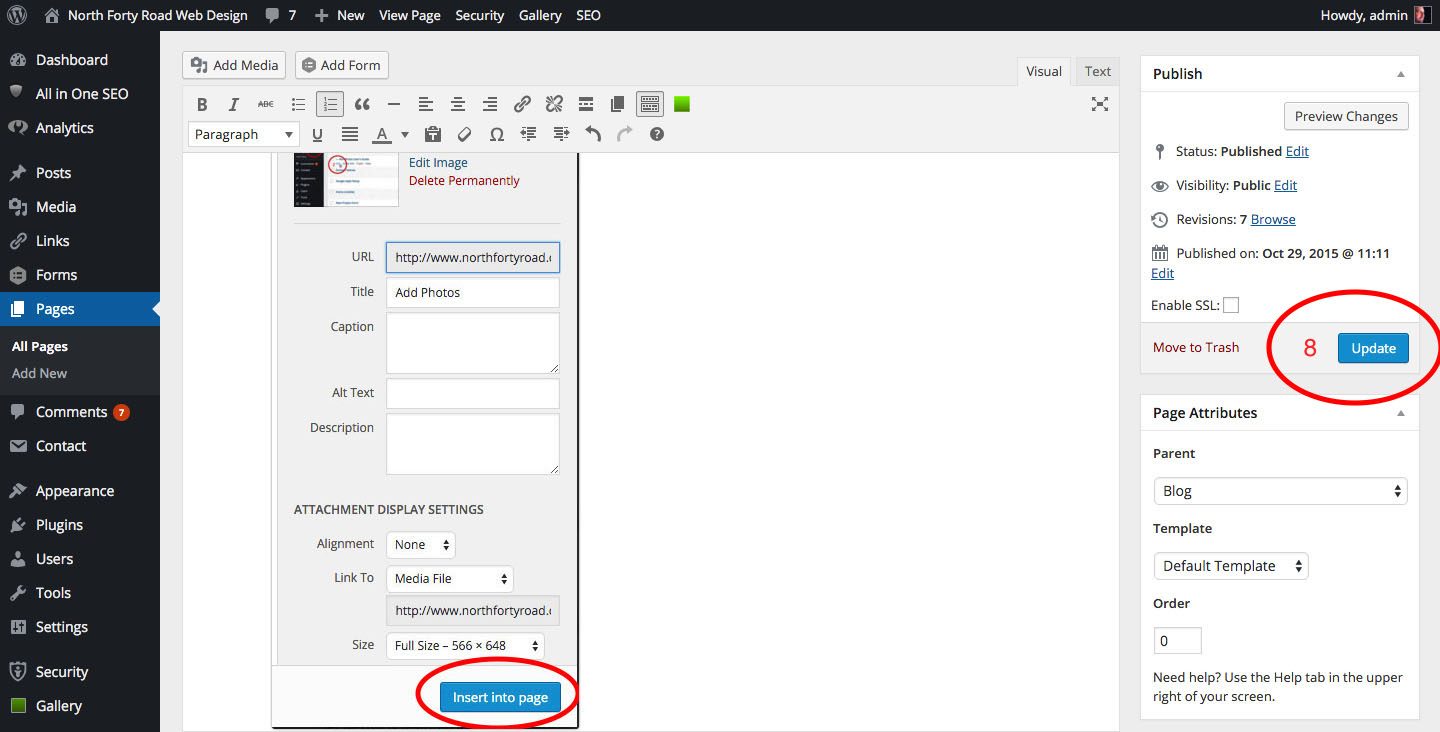
Adding Photos
- Go to the Edit Pages screen by clicking on the “Pages” tab in the left main menu.
- Click on page you want to insert a photo/graphic into.
- Place the cursor where you would like the photo to appear and click the “Add Media” icon.

- Click “Upload Files”.
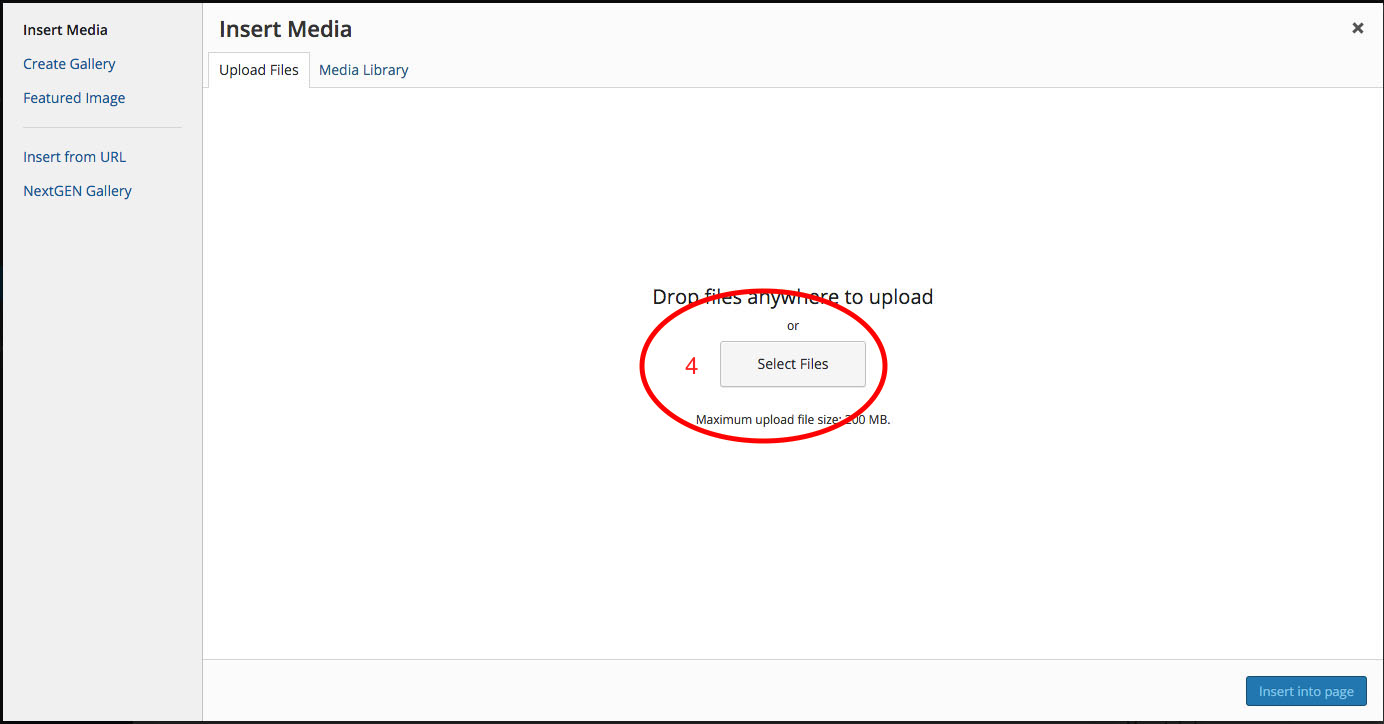
- Navigate your files to find the image you want to load.
- Click on the image and then click “Insert Into Page”.
- On the screen that appears there are options for placement (none means in the next line, left/right mean nested with text around the sides), and size (nothing larger than 600 pixels wide will display well – experiment!). Pick the ones that you want and then click on “Insert Into Post” button.
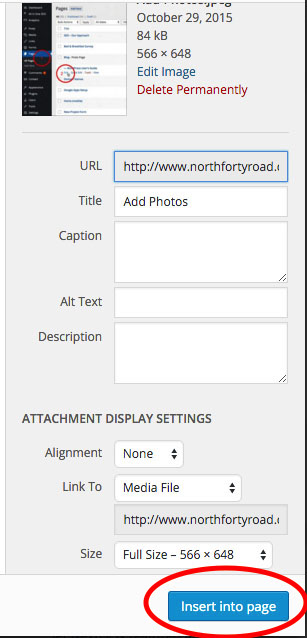
- And, as always, don’t forget to click “Update” button at the upper right.
Glossary of Terms
Background: is the graphic element that resides outside of the website itself.
Blog: short for weblog is an online journal or diary, published by a person or group of people.
Captcha – short for Completely Automated Public Turing test to tell Computers and Humans Apart. They are word and letter verification images required to type in to show you are human and not software designed to send spam.
Content Management System: or CMS, is software used to edit, publish and manage websites, usually from a standard web browser, such as Internet Explorer.
Dashboard: is the administrative screen that controls the editing and administration of the website.
Flash Banner: is a series of combined pictures and text to generate interest and convey a message.
Footbar: a graphic element on each page that contains the navigation breadcrumbs.
Footer: the most bottom part of the website, usually listing the website owner, contact info, and copyright.
Header: the topmost part of the website usually listing the title and tagline.
Homepage: usually the front page of the website. Media: the pictures, images, sounds, and movies.
Menu: the navigation device for the website.
Parent Pages: the top level of a menu item. (Children Pages: sub menu items under a Parent Page.)
Plugins: are software add-ons created to extend the core functionality of WordPress. Currently there are over 5000 plugins for WordPress.
Posts: are entries on the blog page.
RSS: is short for Really Simple Syndication and is a mechanism for feeding information to subscribers.
Searchbar: a utility built in so that any word or phrase can be found on the website.
Sidebar is usually a vertical column packed with lots of information about a website and functional extras.
Template: the website presentation design controls the overall design of a site and encompasses color, graphics, and text. A Template is sometimes called the Theme or skin.
Widget is software added to WordPress that adds functionality to the site and is usually displayed in the sidebar. (Although it can appear in other areas such as the header, footer, etc.) They are plugins.
WordPress: is an open source web application originally designed for publishing blogs and has evolved into a robust content management system.